Settings - IVR
In order to create and setup an IVR please follow the steps below:

NOTE: You will be able to see the settings tab only if you have admin rights.
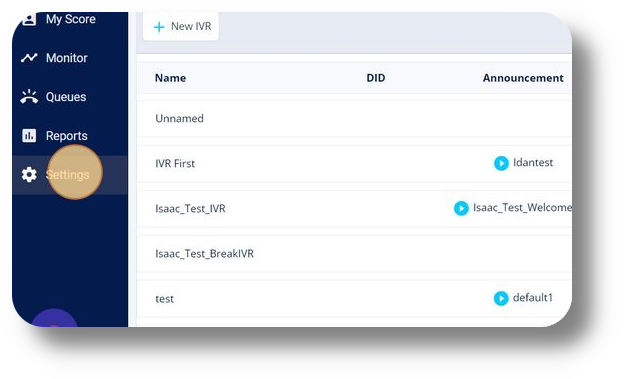
1. Click "Settings" to navigate to the settings page on the left-hand side of the screen:
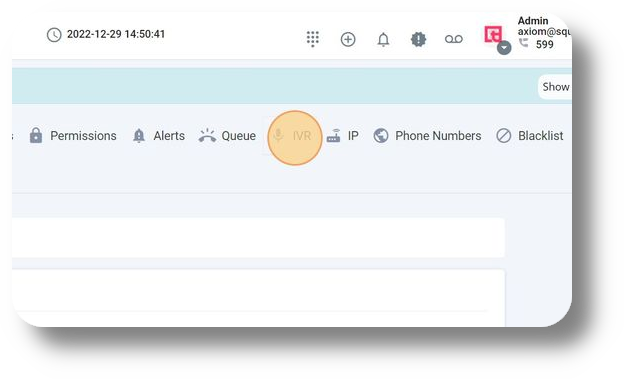
2. Click "IVR" to navigate to the IVR page:
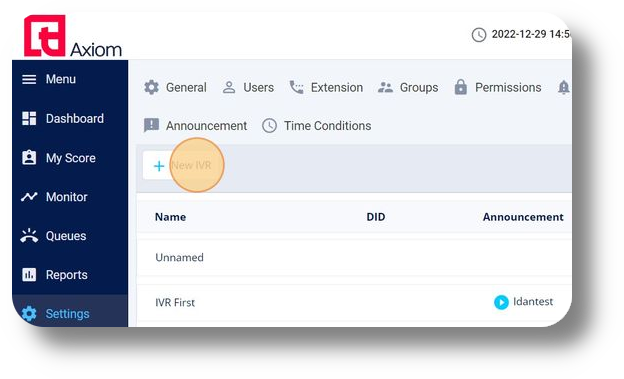
3. Click "New IVR" to create a new IVR configuration:
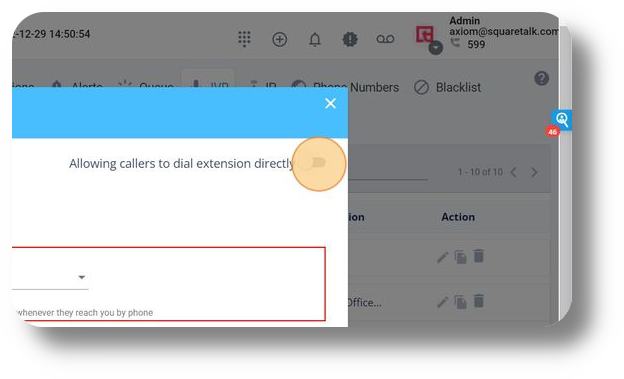
4. In the pop-up menu if you select "Allowing callers to dial extension directly" will allow the customers which are reaching the IVR to dial an extension straight away without going through the options of the IVR system:
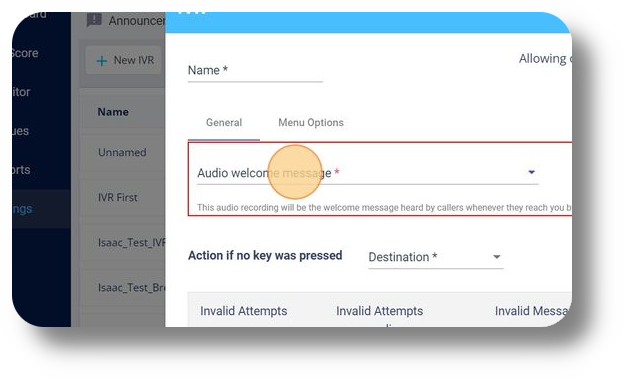
5. Click "Audio welcome message" to select/add recording as a welcome message:
6. Select the file you would like to be your welcoming message:
7. Click "Destination" to select an action if the end-user does not select an option from your IVR:
2. Click "IVR" to navigate to the IVR page:
3. Click "New IVR" to create a new IVR configuration:
4. In the pop-up menu if you select "Allowing callers to dial extension directly" will allow the customers which are reaching the IVR to dial an extension straight away without going through the options of the IVR system:
5. Click "Audio welcome message" to select/add recording as a welcome message:
6. Select the file you would like to be your welcoming message:
7. Click "Destination" to select an action if the end-user does not select an option from your IVR:
8. You can choose to go to an Extension, Queue, another IVR, Time Condition, Announcements, etc.
9. Select the number of invalid attempts possible for an end-user to make before an action is taken:
10. Select a number for Invalid Attempts:
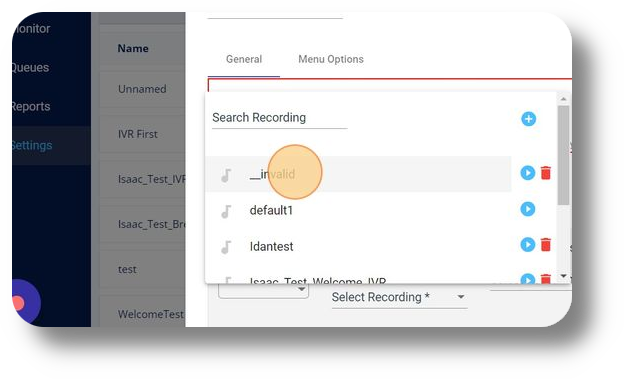
11. Click "Select Recording" under the Invalid Attempts recording for a recording to be played every time a user pressed an invalid entry:
12. Select the recording for Invalid Attempts recording via the drop-down menu:
13. Click "Select Recording" to choose a recording to be played after the invalid retries:
14. Select the recording for Invalid Message via the drop-down menu:
15. Choose after how many seconds of the end-user not pressing a key will get the Invalid Message recording:
16. Click "Destination" to choose a destination for the call after the 'Invalid Message' is played:
17. Select an action from the drop-down menu:
18. Click "Plus sign box" to add an option for your IVR:
19. Click "Destination" to choose the destination for the call after the end-user has selected menu option '1'.
20. Choose a destination from the drop-down menu:
21. You can add multiple options for the end-user. Example: Press 1 for Support; Press 2 for Sales; Press 3 for Finance:
22. Click "Save" to save your IVR configuration:
You can also edit, clone/copy and delete existing IVR's:
Related Articles
How to Configure IVR Menu
How to Configure IVR Menu An IVR (Interactive Voice Response) menu helps direct callers to the right department without manual intervention. Step-by-Step: Create a New IVR Go to Settings → Voice → IVRs and click “+ Add IVR” ?Useful Tip 1: To speed ...How to Set Up Voicemails
How to Set Up Voicemails Voicemails are linked to Users in the Squaretalk Platform. Each user acts as an individual inbox that can: collect personal missed calls store overflow messages from queues serve as a shared voicemail box for teams This guide ...General Settings
This article will provide you with an overview of the General Settings of Axiom: You will be able to see the settings tab only if you have admin rights. 1. Navigate to the Settings option in the left-hand menu to access configuration settings: 2. ...Softphone Settings
In order to access the softphone settings, simply click on the "Menu" button, represented by three horizontal stripes, located in the top right corner of your softphone interface. From the dropdown menu that appears, select the "Settings" option to ...Settings - Organization
This article will provide you more details and information regarding the Organization settings section for Matrix: General 1. Navigate to the Settings tab on the left-hand side and click on General: 2. On this page, you can select the Time Zone for ...