Settings - Permissions
This article will provide you with an overview of the Permission section, functionality as well as how to create a custom one:

You will be able to see the settings tab only if you have admin rights.
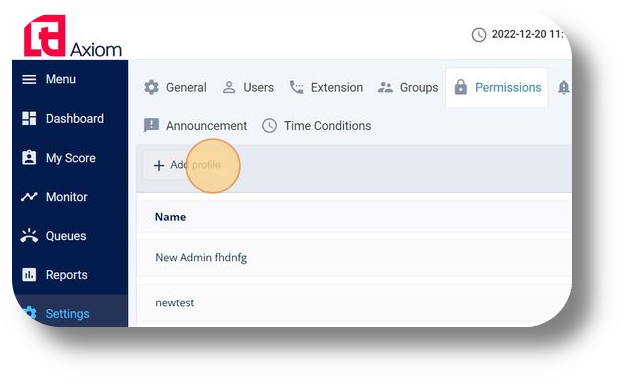
1. Click Settings to navigate to the settings page on the left hand side of the screen:
2. Click Permissions to navigate to the permissions page:
The default profiles are: Agent, Manager and Admin:

3. You can create a custom one by clicking on Add profile:

Admin - that can do and see everything and have access to all the Groups
Manager - that can be limited only to a specific group and will see only the extensions in that group.
Agent - the Agent can see on the Dashboard only the calls from the extension he/she is using.
3. You can create a custom one by clicking on Add profile:
4. Click the Name field to type the name of your custom profile.
Example 'Assistant Manager':
5. Click Select Role to select one of the existing profiles such as Agent, Manager and Admin. After this you will be able to alter the permissions of those roles
6. Here you can change the general settings. By un-clicking one you disable this function for this specific role.
You can individually disable Alerts, Spy, Whisper and Barge options, Personal Settings access and more:
7. By entering a specific number in this field it will show only this amount of digits for this role:
8. Finally click save to add this profile:
Related Articles
User Roles
This article will provide you with an overview of the Profiles section, functionality as well as how to create a custom one: You will be able to see the settings tab only if you have admin rights. 1. Navigate to the Settings section from the left and ...Settings - Organization
This article will provide you more details and information regarding the Organization settings section for Matrix: General 1. Navigate to the Settings tab on the left-hand side and click on General: 2. On this page, you can select the Time Zone for ...General Settings
This article will provide you with an overview of the General Settings of Axiom: You will be able to see the settings tab only if you have admin rights. 1. Navigate to the Settings option in the left-hand menu to access configuration settings: 2. ...Softphone Settings
In order to access the softphone settings, simply click on the "Menu" button, represented by three horizontal stripes, located in the top right corner of your softphone interface. From the dropdown menu that appears, select the "Settings" option to ...Settings - Queues
To create a queue please follow the steps below: NOTE: You will be able to see the settings tab only if you have admin rights. 1. Click "Settings" to navigate to the settings page on the left hand side of the screen: (You will be able to see the ...