Dashboard
This article will navigate you through the available options of the dashboard.
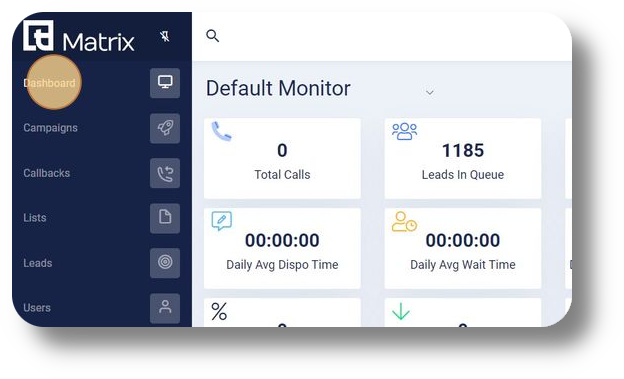
1. Click "Dashboard" to navigate to the dashboard on the left-hand side.
NOTE: You can navigate to the dashboard menu only if you have Admin or Manager permissions:
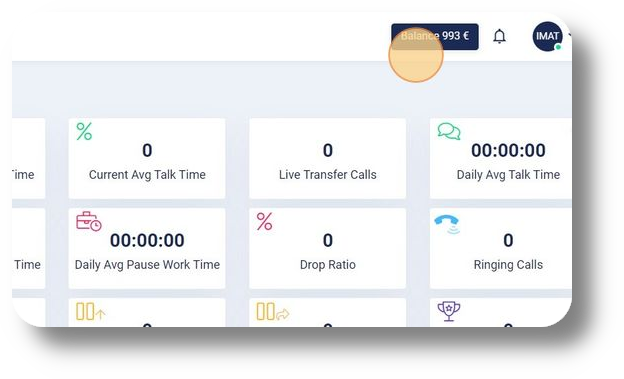
2. Here you can monitor the balance of your account:
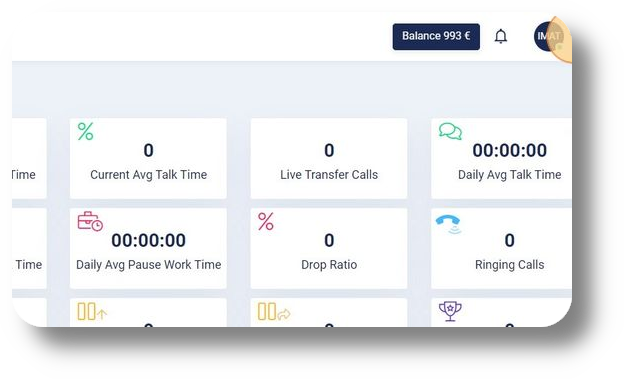
3. Click on your profile icon to access the profile settings of your profile:
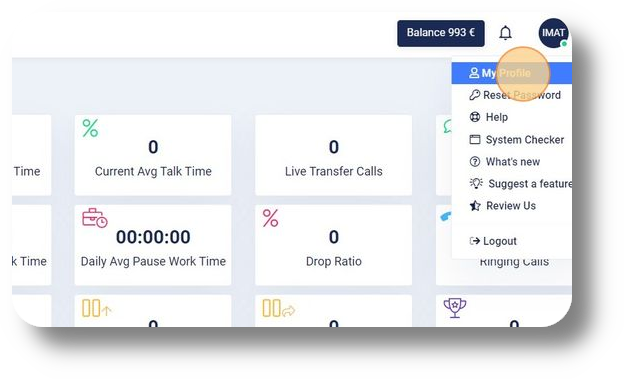
4. Click "My Profile" to navigate to a menu in which you can change your credentials:
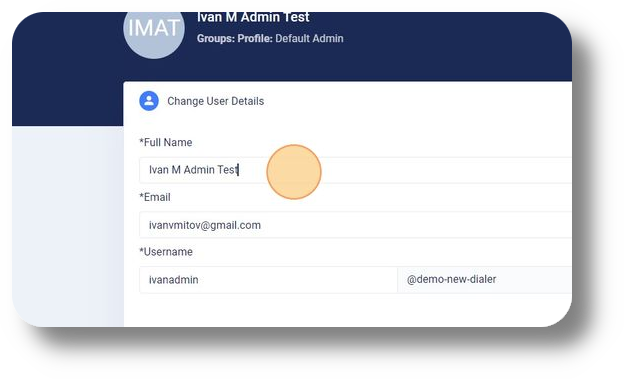
5. In this menu you can change your name, email and username:
2. Here you can monitor the balance of your account:
3. Click on your profile icon to access the profile settings of your profile:
4. Click "My Profile" to navigate to a menu in which you can change your credentials:
5. In this menu you can change your name, email and username:
6. Click "Generate Key" to generate an API Key, or click the 'Documentation' link to navigate to our swagger and review our open API:
7. Click this password field to change your password on the right hand side:
8. Click 'Forgot Password?' if you have forgotten your old password and need a new one, follow the steps below:
9. Alternatively, you can click 'Reset Password' via the profile drop down menu:
10. Click "Help" to navigate to our Q&A portal and get the assistance needed:
11. Click "System Checker" to navigate to the system checker and perform a test on your system:
12. Here you can monitor if everything is working correctly on your system:
13. Click 'Speakers Settings' to change the configuration of your speakers:
14. Click this drop-down menu to choose from which device the audio will be produced:
15. Click 'Microphone Settings' to change the configuration of your microphone:
16. Click this drop-down menu to choose which microphone device you would like to use:
17. Click "OK" to save the settings:
18. Click "Check Again" to perform a new check:
19. You can check on what is new to the system via the profile drop down menu:
20. Click "Suggest a feature" to suggest a feature that is missing from the Matrix. Our development team will be notified:
21. Fill in the form to submit an idea:
22. Click "Review Us" to leave a review in regard to the product:
23. Click "Dashboard" to return back to the dashboard tab:
24. At the top you will be able to monitor KPIs relevant to your company:
25. Click here to edit your monitor view or create a new monitor page:
26. You can edit your KPIs via the green ticks selected. If you select the green tick, it will be displayed on your dashboard monitor:
27. Click "Save" to save the KPIs you have selected:
28. Here you can monitor the Agents that are logged in the Matrix:
29. You can monitor the activity of your company in a Full Screen mode. Click 'Full Screen' to enable it:
30. Click here to exit the Full Screen mode:
31. You can monitor the activity of your company in a Cube View mode. Click 'Cube View' to enable it:
32. Click here to return back to Table View:
33. Click the action button to be able to Listen, Whisper, Break in or Logout the agent. Listen - means that the manager will be able to hear the conversation, without, the agent nor the client knowing that the manager is in the call. Whisper - the manager will be able to speak to the agent, without the client hearing the conversation. Break in - will make a conference call and add the manager to the call:
34. Select an option from the drop-down menu:
35. Click this button to control which KPIs you would like to monitor on your table view:
36. Choose options that apply to you from the drop-down menu:
37. Click the "Search bar" field to search for an agent via name or phone:
38. Click the "Filters bar" field to filter by groups or campaigns:
Video guide:
Related Articles
Agents View - Dashboard
This article will give you an overview of the dashboard from an Agents point of view as well as functionality: 1. Upon logging in you will be prompted to choose your Campaign: 2. After choosing your Campaign you will be presented with your dashboard ...Your Agent View in Squaretalk
Your Agent View in Squaretalk Your Agent View is where your workday happens. From here, you manage your availability, handle calls and chats, and keep track of everything you’ve worked on without switching tools. This guide shows you how to: Change ...Dashboard Overview
This article will show you the general overview of the Axiom Dashboard and it's features: 1. The server time is displayed at the top of the page: 2. Bring up your dial pad by clicking 'Dialpad.' Note: This option is available only if your ...Monitor
This article will provide you more information about the Monitor section and functionality: 1. Enter the Monitor page by selecting "Monitor": 2. Filter agents currently in a call by clicking 'In Call' excluding all others from the monitor list: 3. ...Reset Agent Password
To reset an agents password please follow the steps below: 1. Click on "Users" from the menu on the left: 2. Click on the user you wish to reset the password for: 3. Click on "Edit" so you can make changes to the agents details: 4. Click on the ...