Voicemail setup (Ext & Queues)
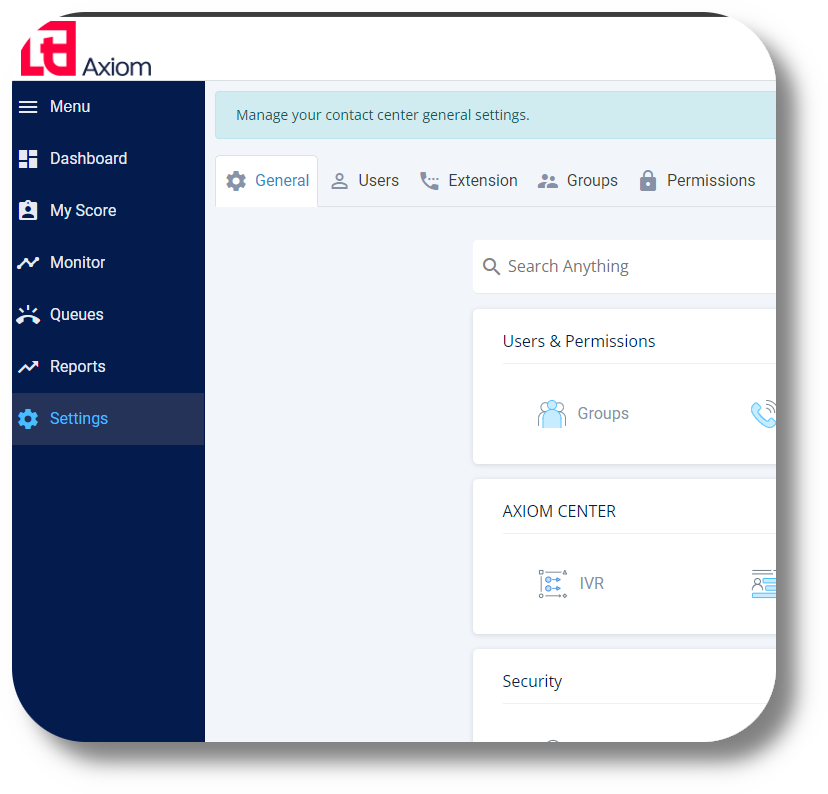
1. To set up a voicemail and enable it for an extension, navigate to the Settings section:

2. Then to the Extensions section:
2. Then to the Extensions section:
3. Click on the
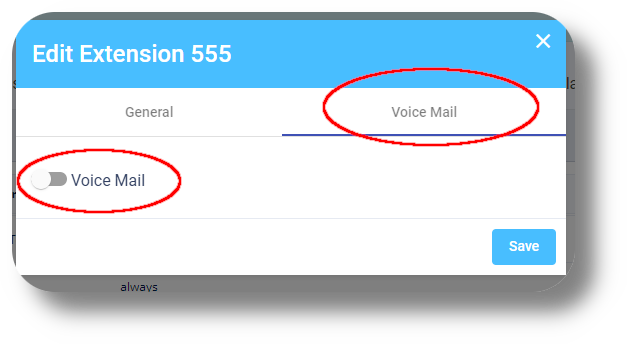
4. Navigate to the Voice Mail section and enable the option:

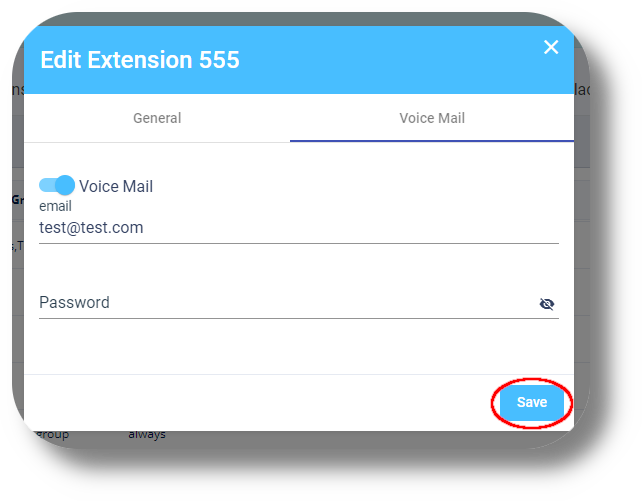
5. Next, fill in your details and click Save (you can skip this part if you do not wish to receive e-mails):

6. To connect an extensions voice mail and use it to a Queue, navigate to the Queues section and click on next to the desired queue:

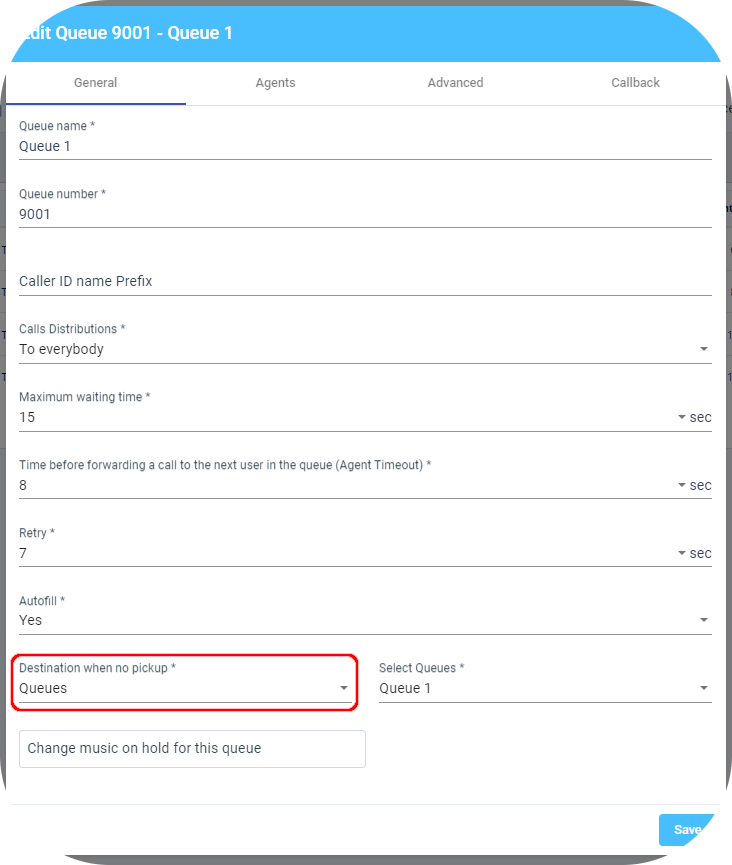
7. Navigate to the Destination when no pickup option:

5. Next, fill in your details and click Save (you can skip this part if you do not wish to receive e-mails):
6. To connect an extensions voice mail and use it to a Queue, navigate to the Queues section and click on
7. Navigate to the Destination when no pickup option:
8. Select Voice Mail and then select the extension you'd like to use:
9. Finally click Save to apply the configuration:
Related Articles
Voicemail Setup (Ext & Queues)
1. To set up a voicemail and enable it for an extension, fist navigate to the Settings and then Extension under the Users & Permissions section: 2. Click on any of the extensions you would like to setup a voicemail for: 3. Navigate to the Voice Mail ...Configuring Voicemail
To configure a Voicemail please follow the steps below: 1. Navigate to the Settings section and then click on Phone Numbers under the Communication section: 2. Click on "+Add New Group" button on the top right: 3. Select the new you wish to apply the ...Settings - Queues
To create a queue please follow the steps below: NOTE: You will be able to see the settings tab only if you have admin rights. 1. Click "Settings" to navigate to the settings page on the left hand side of the screen: (You will be able to see the ...Queues
This article will provide you more information about the Queues section and functionality: 1. Navigate to the Queues page by clicking on 'Queues': 2. Here you can monitor the 'Total calls' across all your queues: 3. Here you can monitor how many of ...Reports - Queues
This article will provide you more information about the Queues section in the Reports. To do this first navigate to Reports on the left side of the menu. 1. Access queue reporting by clicking on "Queues": 2. View missed calls by clicking at this ...