How to Create a Queue (Advanced)
How to Create a Queue (Advanced)
Once your queue is created, Squaretalk allows you to optimize its behavior using the Advanced settings.This guide explains the key options available in the Advanced tab of your queue settings.
Where to Find Advanced Queue Settings
- Go to Settings → Voice → Queues and click on a queue row or “+ Add Queue” to create a new one.
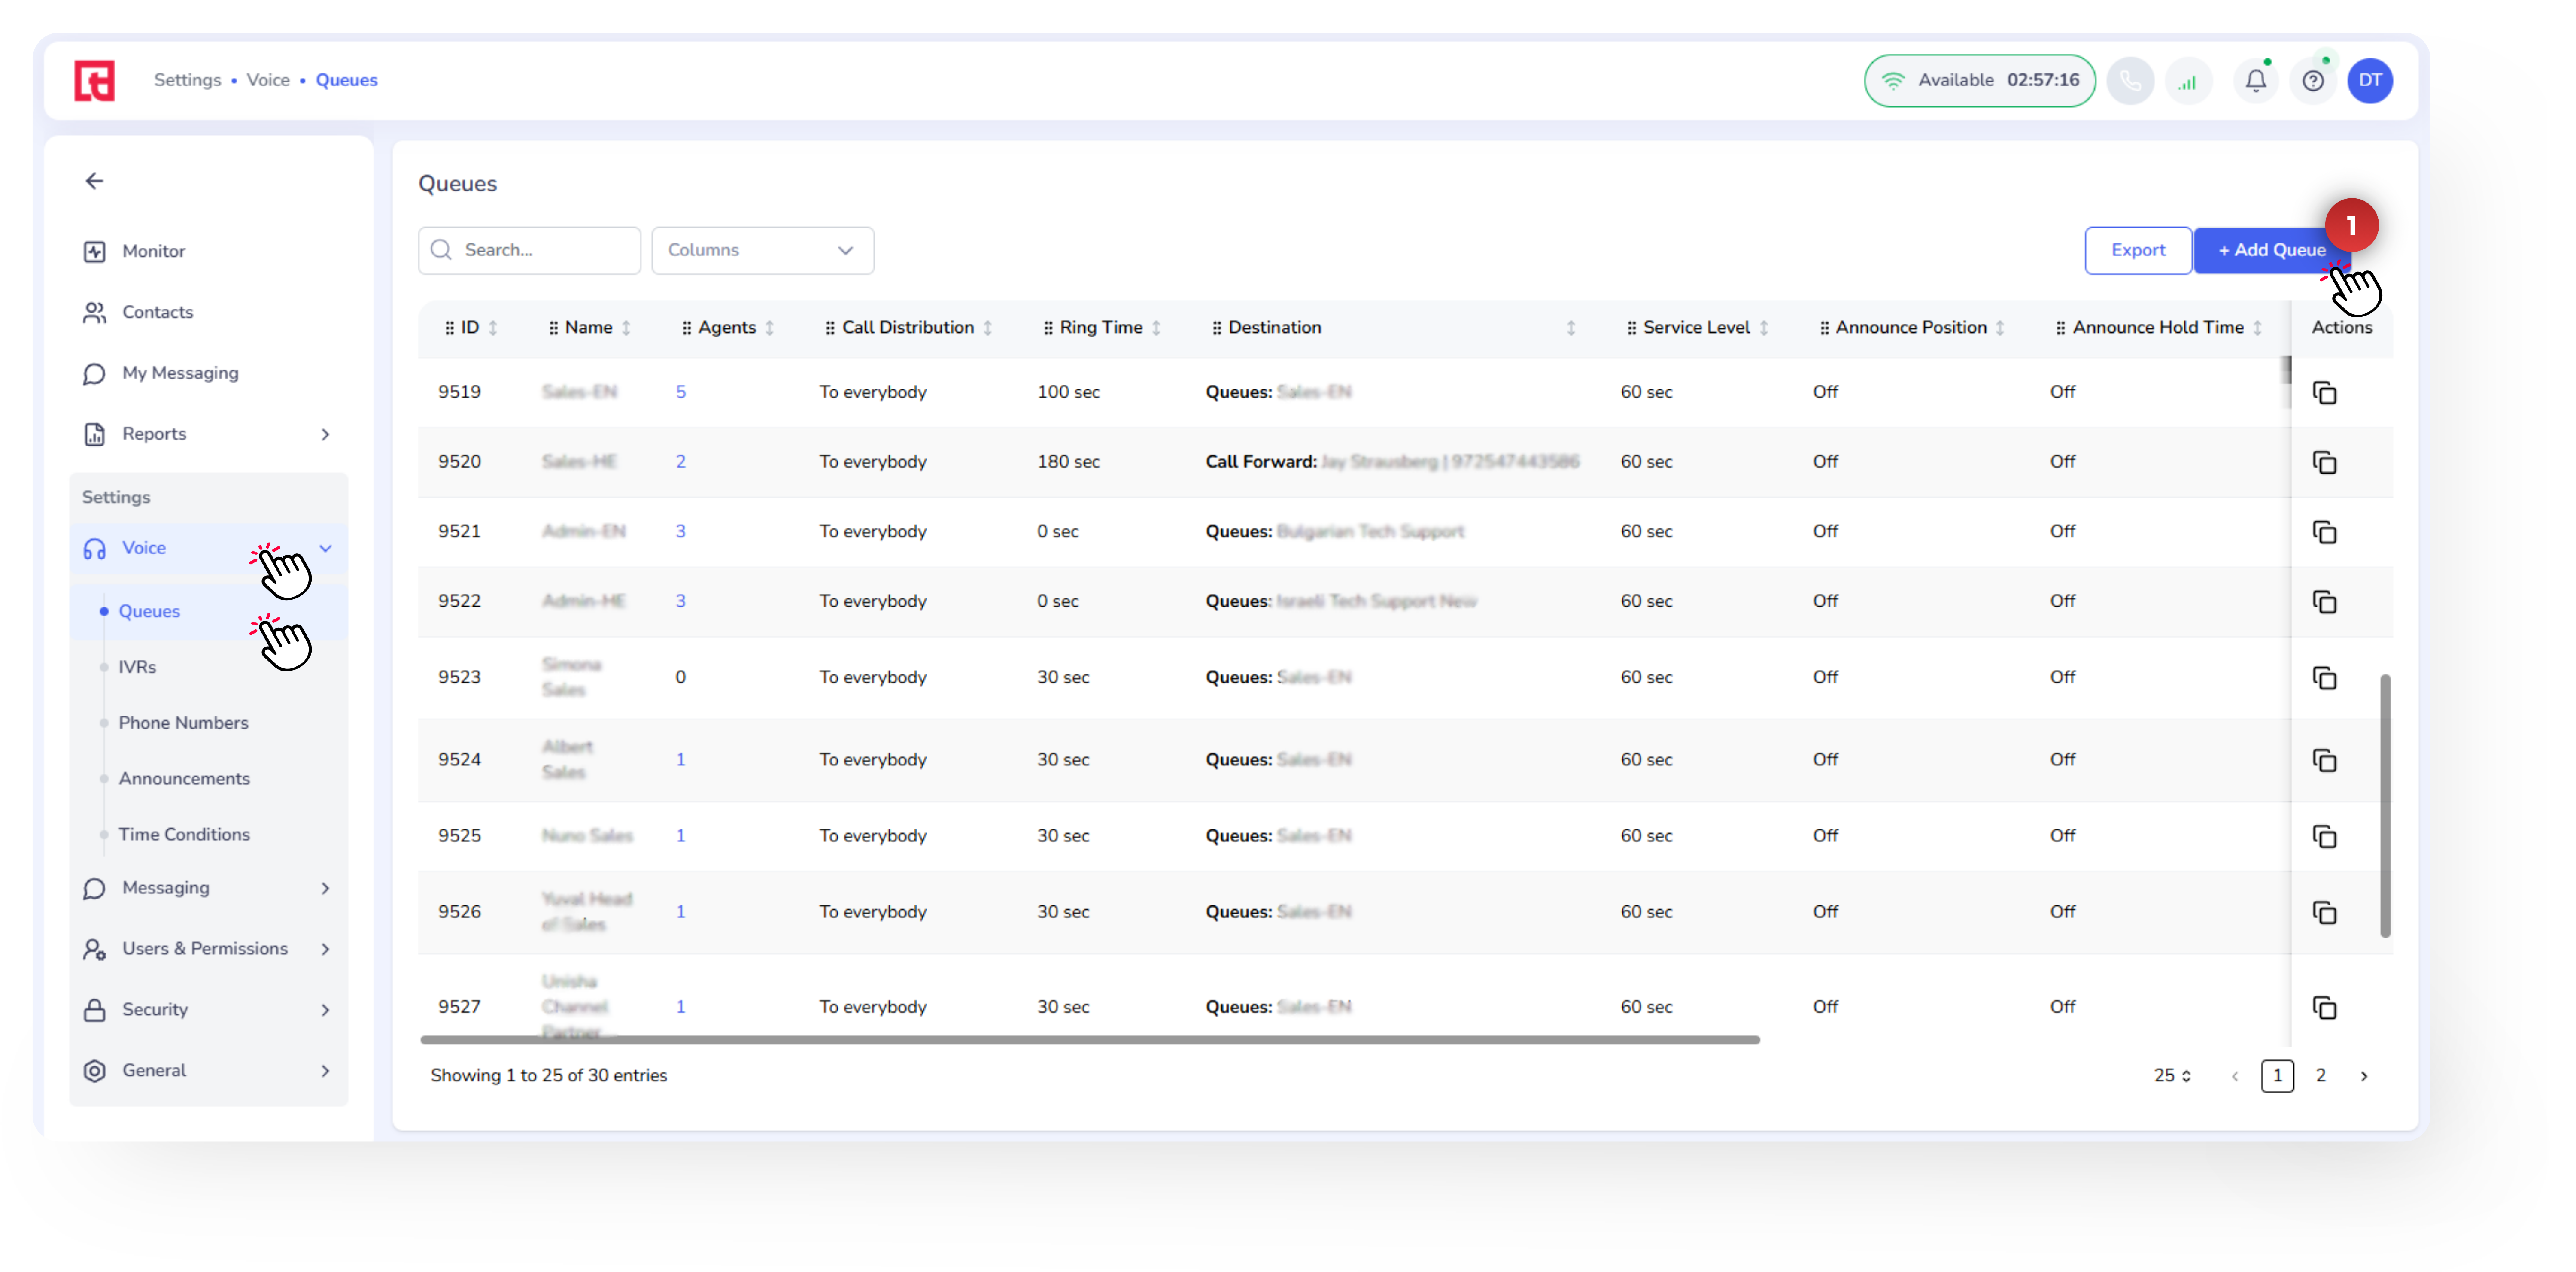
Go to Settings → Voice → Queues and click on a queue row or “+ Add Queue” to create a new one.
Key Advanced Settings Explained
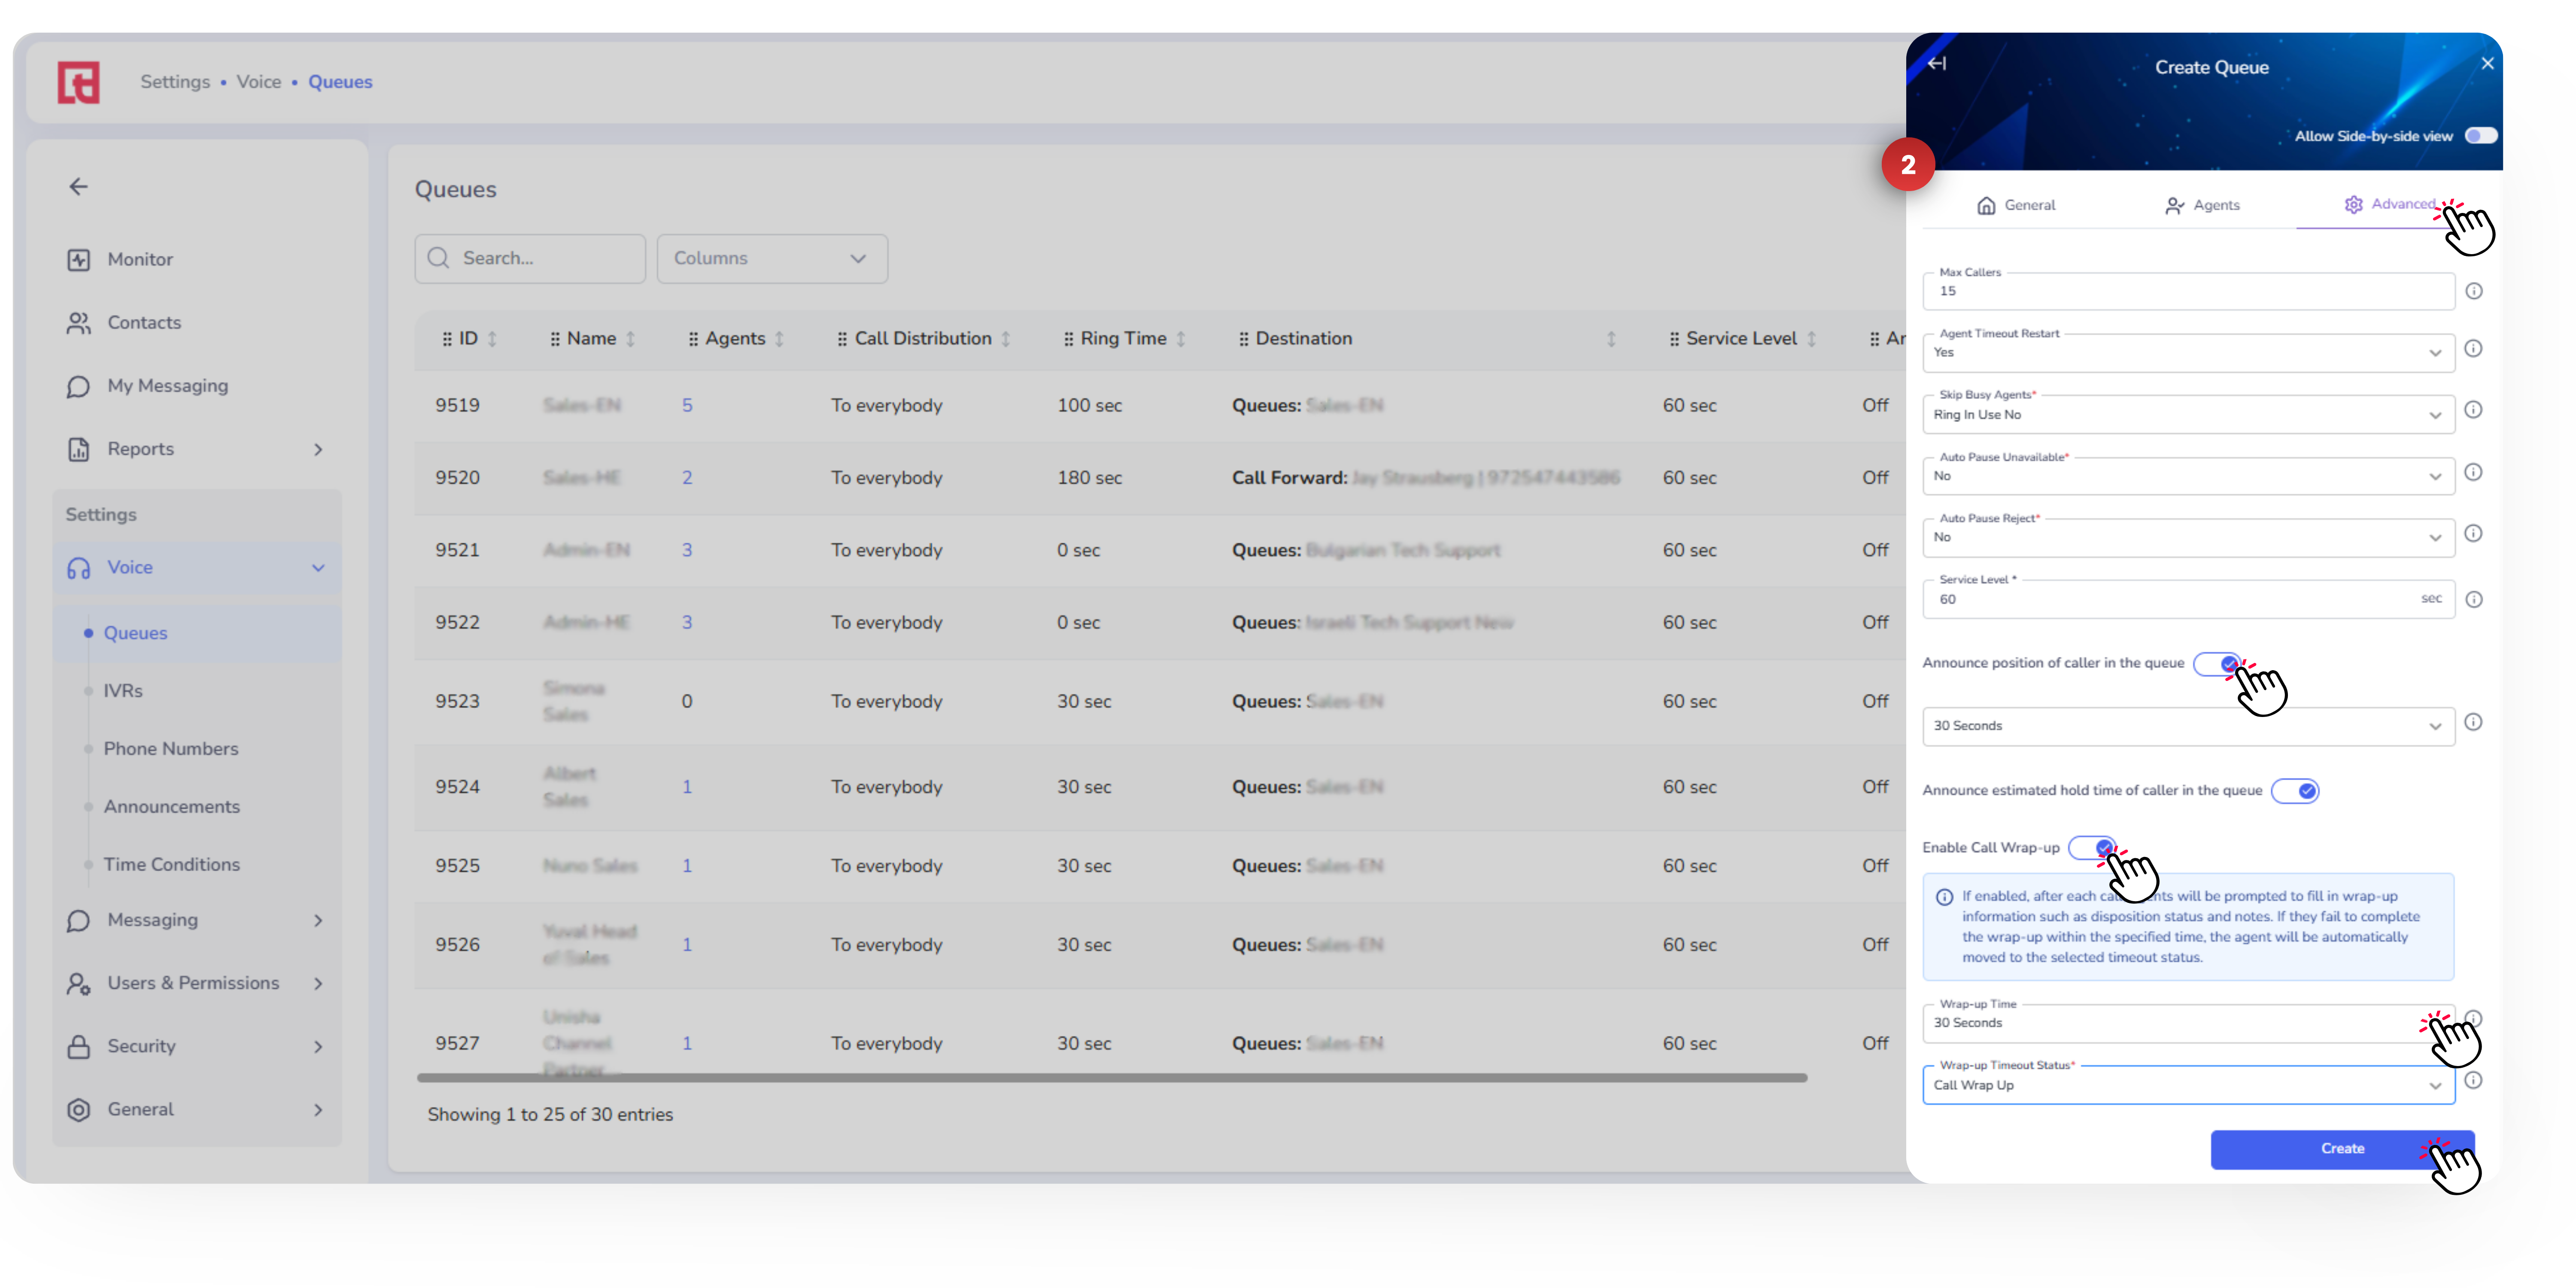
- The Max Callers setting defines how many callers can wait in the queue at the same time.
Once the queue reaches the maximum number of callers, additional callers can be routed to a fallback destination (depending on your routing setup). - Select between Yes and No for Agent Timeout Restart.
- Select between Yes and No for Skip Busy Agents
- Yes → Skip agents who are already busy
- No → Allow call waiting (agents can receive queue calls even while active)
- Select whether to enable the Auto Pause Unavailable. If set as Yes, the agent’s status will be set to Pause Missed in case of a missed call.
- Select whether to enable the Auto Pause Reject. If set as Yes, the agent’s status will be set to Pause Reject in case of a rejected call.
- Define the SLA for your queue.
- Enable announcements that update callers regarding their position in the waiting line and estimated hold time.
- Enable Call Wrap-up to set a short cooldown period (in seconds) after an agent finishes a call, so the agent can complete notes or administrative tasks.
The Max Callers setting defines how many callers can wait in the queue at the same time.
Once the queue reaches the maximum number of callers, additional callers can be routed to a fallback destination (depending on your routing setup).
Once the queue reaches the maximum number of callers, additional callers can be routed to a fallback destination (depending on your routing setup).
Select between Yes and No for Agent Timeout Restart.
Select between Yes and No for Skip Busy Agents
Yes → Skip agents who are already busy
No → Allow call waiting (agents can receive queue calls even while active)
Select whether to enable the Auto Pause Unavailable. If set as Yes, the agent’s status will be set to Pause Missed in case of a missed call.
Select whether to enable the Auto Pause Reject. If set as Yes, the agent’s status will be set to Pause Reject in case of a rejected call.
Define the SLA for your queue.
Enable announcements that update callers regarding their position in the waiting line and estimated hold time.
Enable Call Wrap-up to set a short cooldown period (in seconds) after an agent finishes a call, so the agent can complete notes or administrative tasks.