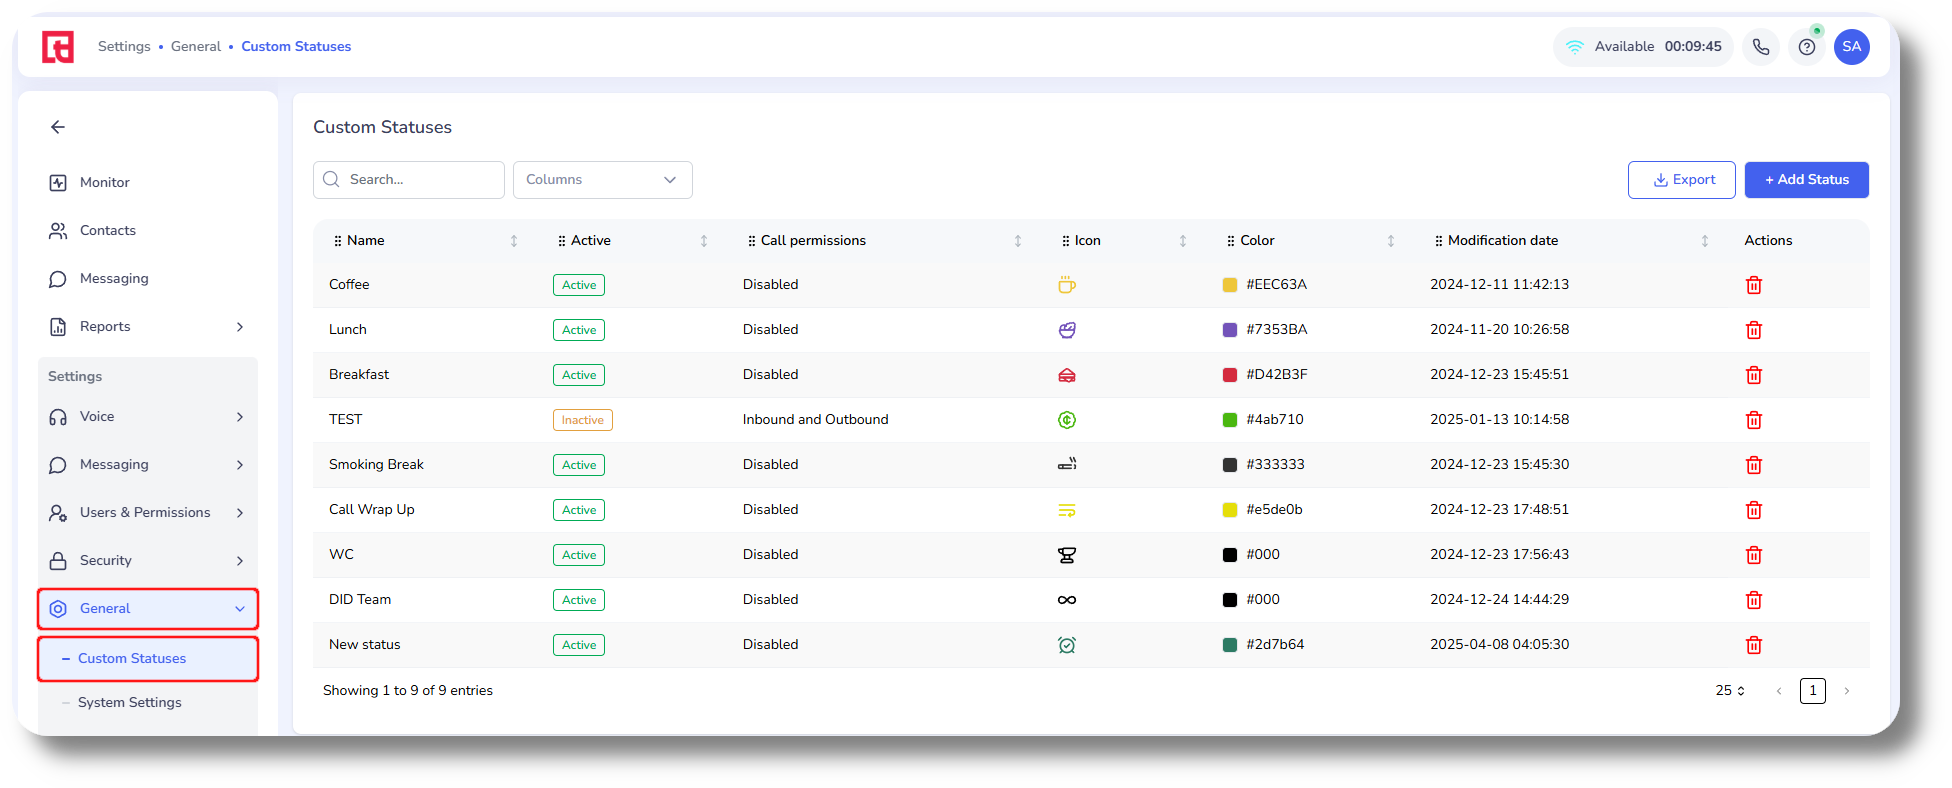
Custom Statuses
1. To create Custom Statuses navigate to the Settings, General Section and click on Custom Statuses:
2. To create a new status click on "Add Status":
3. Next specify a name, color and icon for your status:
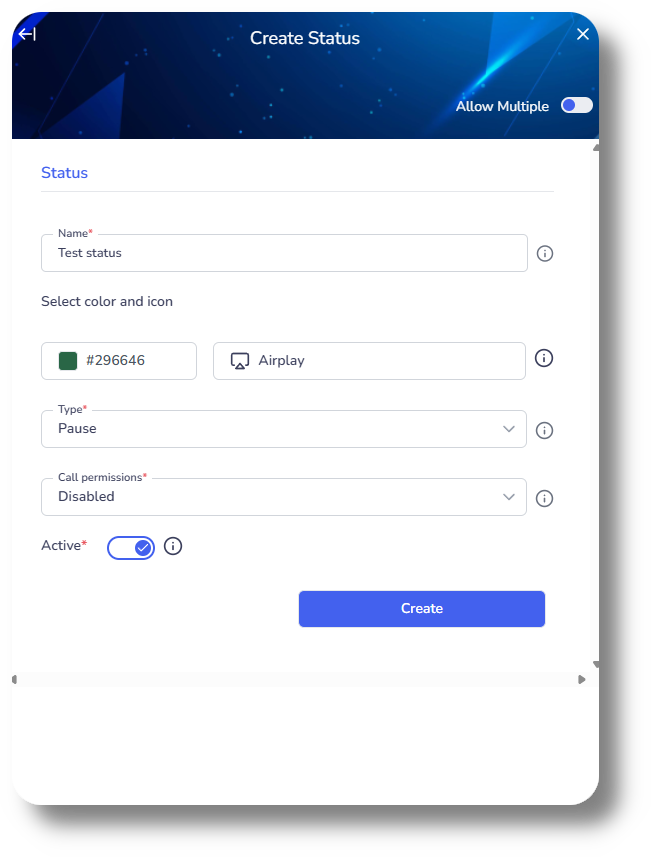
4. Select the Type for this status whether it should be Pause or Work:

Pause status will be used for breaks, while Work status will be used for active work.
5. Next select the Call permissions:
Inbound accepts only incoming calls.
Outbound handles only outgoing calls.
Inbound and Outbound manages both incoming and outgoing calls.
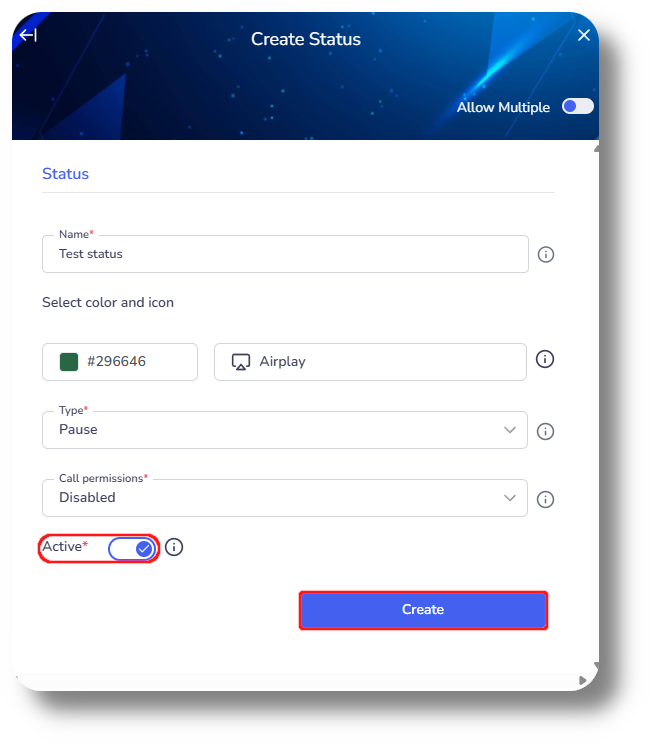
6. Finally enable or disable the status and click Create to finalize your status.
Related Articles
General Settings
This article will provide you with an overview of the General Settings of Axiom: You will be able to see the settings tab only if you have admin rights. 1. Navigate to the Settings option in the left-hand menu to access configuration settings: 2. ...Settings - Customization
This article will provide you an overview of the Customization settings of Matrix: Custom Fields 1. To create and manage Custom Fields, navigate to the Matrix settings by selecting "Settings" on the left-hand side of the menu: 2. Access the custom ...Lists
This article will provide you an overview of the Lists section and it's functionality: 1. Navigate to the lists tab by selecting "Lists" on the left-hand side: 2. Search for a specific lead list using the "Search anything..." field: 3. Apply filters ...How to check your Ticket status
In order to check your status you must first register, you can do so from here. 1. Once registered, log in to the Help Center: 2. Once logged in navigate to My Area, from here you can view your current opened tickets as well as check their status: 3. ...User Roles
This article will provide you with an overview of the Profiles section, functionality as well as how to create a custom one: You will be able to see the settings tab only if you have admin rights. 1. Navigate to the Settings section from the left and ...